Tuesday, November 30, 2010

Autumnal Bounty Dinner Party

"It is better to give than to receive." Sometimes I wonder about that adage. I believe the outcome depends upon which side you're on, the giving or the receiving. It's really just a matter of perspective. Last spring, AngelFood gave a gift certificate for a 6-course dinner party to the Moravian Academy. The gift certificate held a place at a massive silent auction during the Moravian Academy Ball (which was a blast!). It seemed like the certificate was lost amongst the many other entries vying for attention at the ball. Well, if it was lost, that evening it certainly got found. The winning bidder was a lovely lady from a town just up the road from us. After some discussion about food preferences, we developed a menu that we kept secret until that evening. On the menu: Butternut Ravioli in Walnut Sage Butter (photo on left) Wild Mushroom Cappuccino Baby Greens with Pomegranate Vinaigrette, 5-spice Pepitas and Goat Cheese (photo on right) Cranberry Thyme Sorbet (photo on left, served in cordial glasses with rainbow rock sugar and demitasse spoon) 
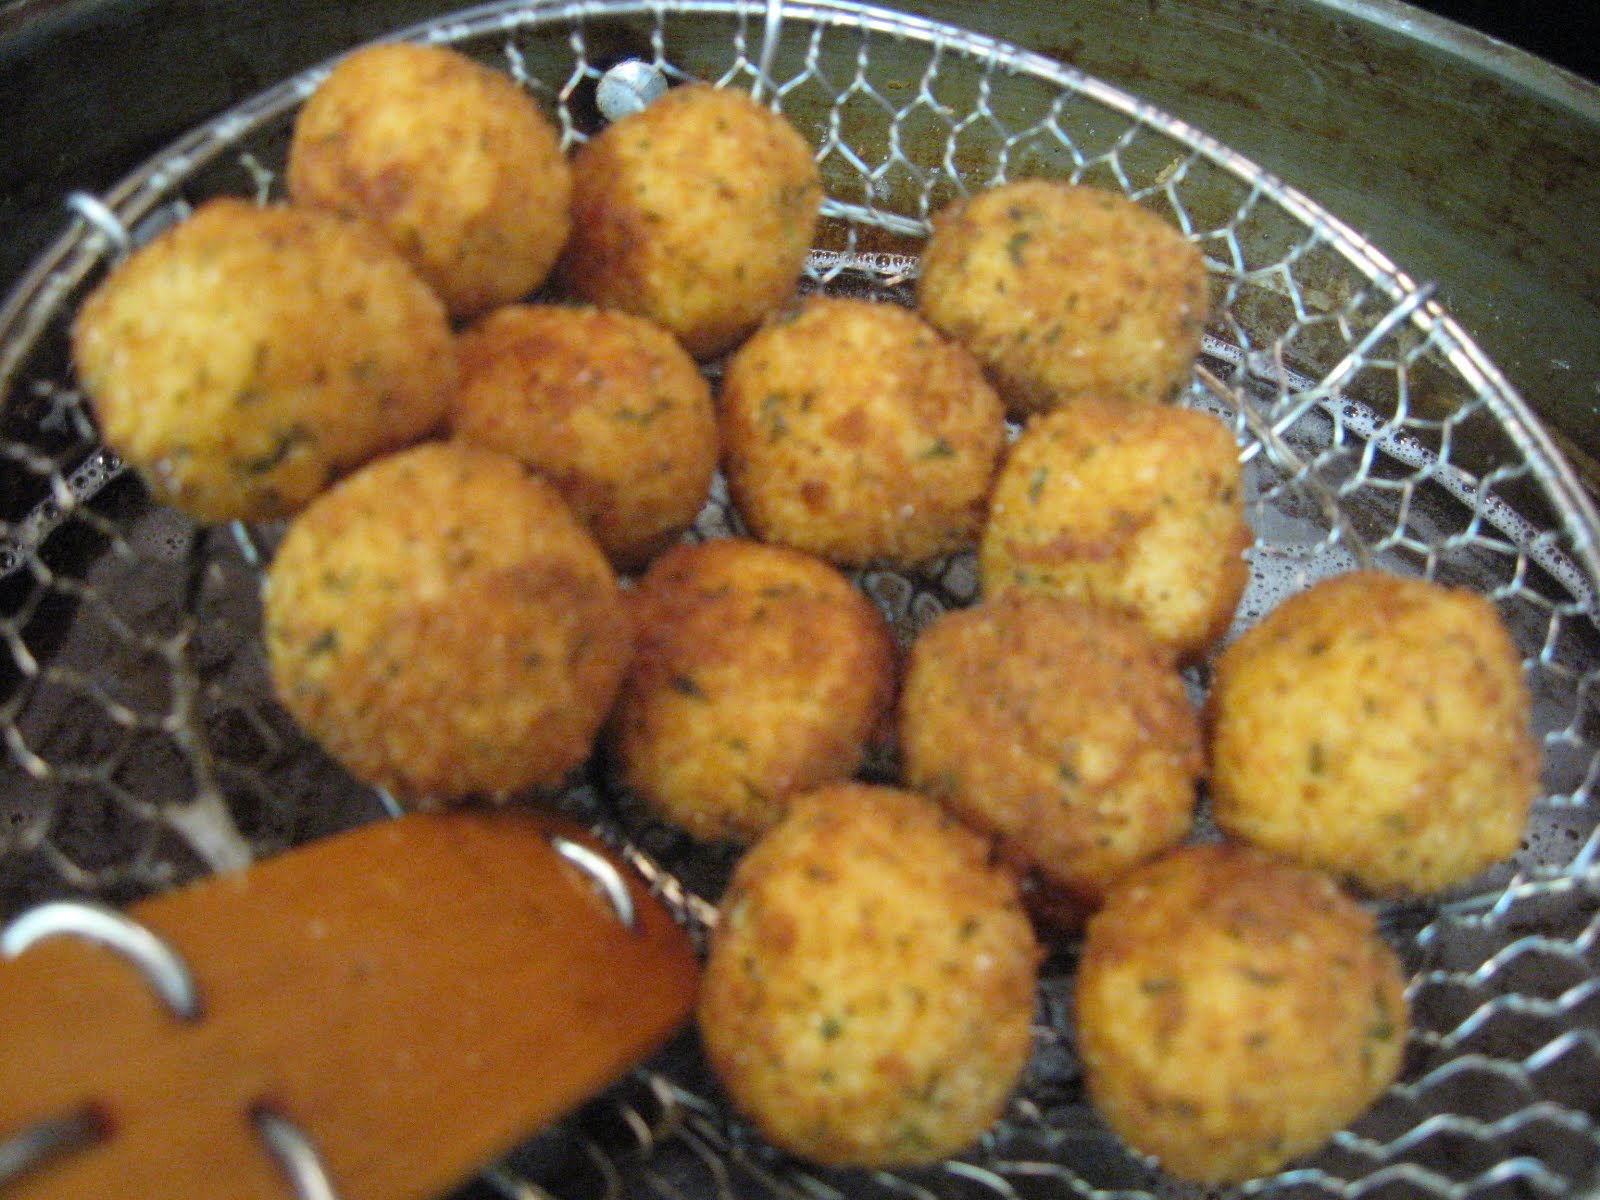
Roasted Rack of Lamb with Fig Relish, Pear (shaped)Potato Croquettes and Romanesco (photo on right. Romanesco is Roman Cauliflower.) Pear Tart with Brown Sugar Ice Cream and Balsamic Syrup It's an understatement to report that a good time was had by all. Although we did provide the gift certificate, we were far from the giving end of this event. When all of the AngelFood stars align and we're able to offer the impeccable service of beautiful food to gracious hosts and their appreciative guests, we feel as though we are the recipients of wonderful gifts.

Monday, November 8, 2010

It isn't easy being Green (Dotters)

From the Lincoln Trail District Area (Kentucky) Green Dot website (bold emphasis is my own): Hundreds of research studies have shown that thousands in the US and around the world are victims of sexual assault, partner violence, stalking or child abuse every year. Each incident hurts us all. These acts of violence are like red dots covering a map, much like an epidemic spreading out of control if not stopped. But, we CAN stop violence and you are a part of the solution. Through your words, your choices and your actions in any given moment, you can add a “Green Dot” to our map-displacing a red dot-and making a difference. A “Green Dot” symbolizes a single moment in time that can be used to end perpetration or support victims of violence. Adding a Green Dot will increase community safety for everyone. If each of us adds 1 or 2 or 5 or 100 green dots-we will begin to reduce violence in our community one green dot at a time. On October 18, AngelFood participated in the 16th Annual Culinary Carousel, which is an event held at Hawk Pointe Golf Club, featuring the area's best restaurants and chefs. The proceeds from ticket and silent auction sales benefits the Domestic Abuse and Sexual Assault Crisis Center of Warren County. We've participated in this event as part of the restaurant committee and preparing the evening's hor d'oeuvre for 4 years.
This year's menu featured Edible Green Dots! We served miniature Arancini (risotto balls being cooked on right) dipped in Pesto (get it, little green dots?!)
And then we began playing with Molecular Gastronomy. On the left are Cilantro Pearls made by combining pureed Cilantro with other food additives. The result are tiny pouches (as seen in the photo on left, suspended in their finishing liquid) of flavor that burst in your mouth. We used the Cilantro Pearls to garnish Crab Cakes on Wontons (as seen in the photo on the right). When all was said and done, we realized we could've used capers but the Cilantro Pearls were much more adventuresome and fun!
The biggest hit of the evening, were the Molecular Olives. We took really good, traditional green olives, on the left, (still the whole green dot theme!) and put them through the Molecular process (in their finishing liquid on right).
We presented the olives on our custom-made spoon display, spooning them on right in front of guests (and fellow chefs) who were amazed by the texture and intense flavor!
We're happy to report that the event raised around $44, 000 for the shelter, helping to provide a place of refuge and safety for victims.
It's not easy being green. It's not easy taking steps towards ending violence. It's not easy speaking out or standing up for the lookout. Like creating Molecular Gastronomy, the process is arduous, time-consuming and frustrating. But as each small goal gets met and each small triumph is made, the results are truly amazing.
In May, I graduated from the one-day Green Dot Training. I wear my t-shirt proudly, helping to spread the message that "No one has to do everything, but everyone must do something" to put an end to violence.

Great is my Thankfulness

As printed in the Washington Messenger, November 2010
I practice living daily with an attitude of gratitude and I truly have countless reasons to be grateful. This year, however, I am made painfully aware of some of my most heartfelt thanks. I am grateful to my grandmother, Romaine. Grammy, as we called her, passed away this August, about 6 weeks shy of her 100th birthday. (She's the baby in the center of the photo on the left. How much fun is Pappy having??) Like everyone else, I dislike funerals. But if I could eulogize a life well lived with anyone, I was okay celebrating this woman’s life with this branch of my family. Grammy (on the right, enjoying a party with her BFF) was the type of woman who, on the spur of the moment, one morning at eight o’clock am, produced homemade fastnachts from a newspaper recipe because her grandkids asked her to. She kept a huge bowl of pie crumbs in the cupboard (for whenever she needed them) and never admonished anyone for taking a quick dip out of the bowl. When you slept over, there were two breakfast choices…cornflakes or Oreo cookies. Guess which one I chose? She provided a place for us to run free, secure in the notion that after a long day of play, there would be a nice dinner on the table, a warm bath, candy dishes that were perpetually full and lots of hugs and kisses. Grammy was the type of woman who, after losing her husband of 25 years to Type II diabetes on December 23 insisted on continuing our annual ritual of gathering on Christmas Eve. It was better to celebrate life surrounded by those you love rather than mourn alone, realizing, as in most cases, that our gain really is greater than our loss. On right: One of the greatest moments of my life, taking Grammy to lunch after her first grandchild graduated from college at the prestigious Culinary Institute of America. I think she deserved a nice lunch after all the meals she prepared.
So, this month, I’ll share a pie recipe that perhaps you can enjoy at your table of thanks. I’m sorry to report that it’s not her recipe because she didn’t use any recipes for pie. In a perfect world, you’ll take a bit of quiet time for yourself and while you’re attempting to get the dough the way you want it and the crumbs “just so” you’ll contemplate love, freedom and all the gains that outweigh your losses. Pear and Hazelnut Crumb Pie Easy Pie Crust: 1 cup all purpose flour 1/3 cup cake flour 1 tablespoon sugar 1/2 teaspoon salt 6 tablespoons (3/4 stick) chilled unsalted butter, cut into 1/2-inch pieces 2 tablespoons chilled solid vegetable shortening, cut into 1/2-inch pieces 3 tablespoons (or more) ice water Blend first 4 ingredients in processor. Add butter and shortening and cut in using on/off turns until mixture resembles coarse meal. Add 3 tablespoons ice water and process until moist clumps form, adding more water by teaspoonfuls if dough is dry. Gather dough into ball; flatten into disk. Wrap in plastic; refrigerate 1 hour. (Can be made 2 days ahead. Keep refrigerated. Soften dough slightly at room temperature before rolling out.) Roll out dough disk on floured surface to 12-inch round. Transfer to 9-inch-diameter Filling : 1/2 cup (packed) golden brown sugar 2 tablespoons all purpose flour 1 tablespoon butter, melted 1 tablespoon fresh lemon juice 1 teaspoon ground cinnamon 1/2 teaspoon ground nutmeg 3 pounds ripe Anjou pears, peeled, cored, cut into 3/4-inch pieces (about 5 cups) Topping: 3/4 cup all purpose flour 1/2 cup sugar 1 teaspoon ground cinnamon 1/4 cup (1/2 stick) unsalted butter, cut into 1/2-inch pieces, room temperature 3/4 cup hazelnuts, toasted, husked, coarsely chopped For filling: Stir first 6 ingredients in large bowl. Add pears and toss to coat. For topping Whisk flour, sugar and cinnamon in medium bowl. Add butter and rub in with fingertips until mixture resembles coarse meal. Mix in nuts. Preheat oven to 375°F. Spoon pear filling into pie crust. Sprinkle topping evenly over filling. Bake pie 15 minutes. Reduce oven temperature to 350°F. Continue baking pie until pears are tender and filling is bubbling thickly, covering edges with foil if crust is browning too quickly, about 1 hour 5 minutes longer. Cool pie on rack at least 2 hours. Serve slightly warm or at room temperature. Makes 1 (9-inch) pie. Source: epicurious.com

Monday, October 11, 2010

The Bahrain Challenge

I'm happy to report that AngelFood has been so busy that it seems I've had a hard time lifting myself out of the steamy kitchen to catch up with the world. But the world keeps on turning!
While I was cooking, I received a message from my younger sister, Audrey, a surgeon in the Navy who is currently waiting in the Kingdom of Bahrain for another ship to pick her up. It's not that she makes a habit out of hanging out in foreign countries, hoping to hop aboard a floating vessel. She was actually fulfilling time aboard the USS Elrod in the Gulf of Aden.
In the photo, right, Audrey is on the far right, armed with pan spray. This crew is baking cookies for 360 sailors from the recipes we sent them.
Her message said: Hey I have an AFPCS (AngelFood PCS) challenge for you. We are in Bahrain and we are trying to cook/eat on the local economy. The good news is that the foodstuffs here are GREAT. The bad news is that all we have to cook with is a gas grill and a microwave. Any meal suggestions? We've already done burgers, baked potatoes, fajitas and chicken.
She knows how I love a challenge. I wish she could get her hands on a crock pot. Then she'd really be in business. But for now, AngelFood is going to answer the call! The first dish I thought of was pizza. Here's a recipe from the book Grilling written by CIA (that's my alma mater, The Culinary Institute of America, not the government agency).
They recommend grilling the onions for the pizza before you begin. You can use uncooked sweet onions like Vidalia or Walla Walla. The tomato sauce you use should not be too watery.
Grilled Pizza
Makes 1 to 8 servings (we like pizza)
2 1/2 tsp active dry yeast
2 cups warm water
2 cups all-purpose flour
1 cup semolina flour, plus extra for dusting
1 Tbsp. salt
1/4 cup olive oil
1 1/2 cups tomato sauce
2 cups grated mozzarella
1/4 cup diced sauteed onions
2 Tbsp. basil chiffonade
Combine the yeast and water in a bowl and stir to dissolve. Let the mixture sit until a thick foam forms.
Add the flours and salt to the yeast and stir by hand, or mix on medium speed in an electric mixer using the dough hook attachment, until the dough is smooth and elastic, about 5 minutes.
Transfer the dough to a second bowl that has been lightly oiled. Cover the dough with a clean kitchen towel and let rest at room temperature until nearly doubled in size, about 1 1/2 hours.
Gently fold the dough over and allow it to rise for another 45 minutes.
Preheat a gas grill to high. If you are using a charcoal grill, build a fire and let it burn down until the coals are glowing red with a moderate coating of white ash. Spread the coals in an even bed. Clean the cooking grate.
Roll or stretch the dough into a 12-inch round. Lightly dust a 12-inch pizza pan with semolina flour and lay the dough round on top. Brush some of the olive oil over the entire dough round.
Lift the dough from the pan and place the pizza dough directly on the grill with the oiled side face-down. Brush the dough with the remaining olive oil. Grill the pizza until the dough is maked and puffs up slightly, 3 to 4 minutes. Flip the pizza over and spread the sauce evenly over the round, leaving a 1/2-inch border around the outside edges. Evenly sprinkle the cheese over the sauce and top with the onions. Close the lid on the grill. Cook the pizza until the crust is golden brown and the cheese is slightly brown and bubbly, about 2 to 3 minutes more.
Remove the pizza from the grill and sprinkle the basil chiffonade on top. Cut the pizza into 8 slices and serve immediately.
Just a couple of notes: Audrey can get pizza in a cone at the movies in Bahrain. It's called Kono Pizza and is from a licensed Italian Franchise. She says it's baked perfectly and is delicious. I hope she's not tired of pizza.
AngelFood recently catered a party at the Musconetcong Watershed Association and got to talking with our friend, Assemblyman John DiMaio about grilling pizza. (That's him on the left, enjoying an Antipasta Brochette) He's been making grilled pizza a lot this summer. His advice to Audrey? "Tell your sister to make sure the grill top is closed and the grill is turned on high. You want to get the temperature up to about 400 degrees. I use a pizza stone and it turns out great. You just gotta make sure the grill is good and hot."
Sometimes, at home, for a quick, tasty, thick pizza sauce, I use a can of tomato paste, seasoned and slightly thinned with water. I like the sweetness of the paste and the thickness can be adjusted to taste.
What do you think Audrey should be making with her microwave and grill? More ideas and recipes to come!

Friday, October 8, 2010

Spice is the Variety of Life

Our friend Denise writes: Dear Chef Jewels, I am wondering if you can make any suggestions for what I can make using these spices: Baharat spice and Ras el Hanout. I'm dying to use them...thanks! I am very familiar with Ras el Hanout. It is a popular spice blend used across Northern Africa, especially Morocco. The name Ras el Hanout translates to "top of the shop" as it represents the best spices a shopkeeper has to offer. Like curry, there is no set-in-stone recipe for Ras el Hanout, everybody's got their preferred, sometimes top secret formula. Some ingredients still foreign to the Western world such as ash berries, orris root and chubebs are in the recipe but around here you'll find Ras el Hanout containing spices such as cinnamon, cumin, cardamom, cloves and chili peppers, to name a few. It can be used on almost all foods, as meat rubs and even stirred into rice. I'm not sure if this liberal use is attributed to the spice's taste or because it's sometimes considered an aphrodisiac! Baharat is a blend I am unfamiliar with, so I did a bit of research. Baharat is more Turkish, Arabic and/or Iranian. Turkish Baharat contains a fair amount of mint. You might also find cassia (cinnamon), cardamom, allspice, pepper, cloves and cumin. It is used to flavor soup, lamb, chicken, fish and beef. Sometimes it is used as a condiment to add flavor to food after cooking, also. Lebanese Lamb and Bean Stew 1 lb dried navy beans, picked over and rinsed 2 lb boneless lamb shoulder or boneless leg of lamb, trimmed of excess fat and cut into 1 1/2-inch cubes 1 tablespoon plus 1 teaspoon baharat* or 1 (3-inch) cinnamon stick 9 cups water 2 tablespoons olive oil 2 medium onions, chopped 4 garlic cloves, finely chopped 2 teaspoons salt 3/4 teaspoon black pepper 3 tablespoons tomato paste Accompaniments: spiced basmati rice, pita bread
Cover beans with cold water by 3 inches in a bowl and soak at room temperature at least 8 hours. Drain well in a colander. Bring lamb, baharat, and water (9 cups) to a boil in a 6- to 8-quart heavy pot, then vigorously simmer mixture, covered, until meat is almost tender, 1 1/4 to 1 1/2 hours. Add beans and cook, uncovered, until beans are tender, about 1 hour more. Meanwhile, heat oil over moderate heat in a 12-inch heavy skillet until hot but not smoking, then cook onions, garlic, 1/2 teaspoon salt, and 1/4 teaspoon pepper, stirring, until onions are pale golden and tender, 8 to 10 minutes. Stir in tomato paste and cook, stirring, 2 minutes. When beans are tender, stir in tomato-onion mixture and simmer until just heated through, about 5 minutes. Stir in remaining 1 1/2 teaspoons salt and 1/2 teaspoon black pepper. Makes 8 servings. Source: epicurious.com Chicken with Figs in Ras el Hanout and Couscous 6 whole chicken leg-thigh pieces (about 4 1/2 pounds total) 1 tablespoon salt plus additional for seasoning 4 tablespoons olive oil, divided 12 baby carrots, peeled 1 cup shallots, peeled, halved (about 4 large) 3 garlic cloves, peeled 1 teaspoon fresh chopped thyme plus additional for garnish 1/2 teaspoon finely grated lemon peel 2 tablespoons ras-el-hanout 3 cups low-salt chicken broth 3/4 cup dry white wine 14 Brown Turkey figs, halved 2 teaspoons Sherry wine vinegar Couscous (prepared according to package directions) Arrange chicken on rimmed baking sheet and sprinkle each side of each piece with 1/4 teaspoon salt. Cover with plastic wrap and chill overnight. Preheat oven to 350°F. Heat 1 tablespoon oil in large nonstick skillet over medium-high heat. Transfer chicken to skillet and sear until golden, 5 to 6 minutes per side. Transfer chicken to heavy roasting pan, skin side up. Add carrots, shallots, garlic, 1 teaspoon thyme, lemon peel, ras-el-hanout, chicken broth, white wine, and remaining 3 tablespoons olive oil to skillet. Bring to boil, whisking up brown bits. Pour mixture over chicken in roasting pan and bring to simmer over medium heat. Cover with foil; place in oven. Braise 1 hour, until tender. Transfer chicken, carrots, and shallots to baking sheet; discard garlic. Pour pan juices into large saucepan. Spoon off fat from surface. Boil juices until reduced to 1 3/4 cups, whisking occasionally, about 18 minutes. Add figs and vinegar; cook until figs are just heated through, 3 to 4 minutes. Season with salt and pepper. Place cooked couscous on large plate. Top with chicken, vegetables, and figs. Spoon sauce over chicken and figs. Garnish with fresh herbs and serve immediately. Makes 6 servings. Source: epicurious.com

Thursday, October 7, 2010

Maintaining Your Edge

A question from our friend, Carole:
Dear Chef Quelly,
I made the investment many years ago to get a few good kitchen knives. I got a honing steel with the big knife, (and even a video to teach me how to use it), but I think it's time for a professional sharpening. I can even see little nicks in the blade when I look closely. Is this the right answer and if so, any idea where I can get it done locally? Appreciate your insights.
Well, here are my initial insights. I hate sharpening my knives. I have always been too impatient to do the job, but it's a necessary practice as a good cook.
But, moving on...A sharp knife may help prevent fatigue and accidents, as you put less effort into getting hard foods cut. A sharp knife is nicer to your food as it does not bruise before cutting onions and garlic (and have you ever made sauce when you only want to dice a tomato?).
Those little nicks are called micro-serrations and can be helpful, aggresive cutters--if you're slicing rope, which you are not. Sometimes you can see a dull edge. Under bright light, a dull knife, nicks and burrs will reflect a glint. A sharp knife will not.
I have a basic 2-sided (2 different grits) bench stone purchased at a hardware store. In a different stone I purchased, came a little plastic 20 degree wedge that I could use to guide my knife while stroking on the stone, which helped me get the correct angle (my biggest problem). Maybe you know a woodworker or handy person who can make you a tiny wedge. It's a great tool. Sharpening guides can also be purchased, but they do take up some room on the stone.
Once you start to sharpen, you should see that you are removing just the edge. Steel naturally forms a burr, a thin bendable projection on the edge. You might see or feel the burr. It will be on the side opposite to the one you are grinding. As you become more proficient, you'll be looking for a smaller and smaller burr. Sharpen both sides evenly. When you see the burr, use the finer grit stone to remove the coarse marks left by the coarse stone. A finished edge is sharper and more durable. A steel is used after and in between sharpening removes the burr.
Control your sharpening angle, sharpen until a burr is raised and then hone that burr to a fine finish.
I can definitely support the notion of professional grinding. With good steel knives, it is more difficult to achieve and keep an edge, but the knife will stand up to a lifetime of use and sharpening. I do not support the grinding of knives by anyone but an experienced professional, especially if you might be heartbroken by a damaged knife. Once whittled, you can never go back.
I telephoned my friend and stylist, Penny Deemer, owner of Copper's Salon for professional sharpening recommendations. She's been sending her scissors out to the same man, Mr. Smith for 26 years. He returns your tools the next day and does much of the finishing and honing by hand. Penny said, "Mr. Smith will tell you which knives will be worth it and which will not. Some [knives and scissors] hold [an edge] and some don't. Jewels, I still have the same pair of scissors I was using in beauty school. I can still use them." Mr. Smith can be reached at 908-722-4941.
Carole, after you and I both employee Mr. Smith, I think we should have a quarterly neighborhood knife sharpening party, just to maintain our edge.

Friday, September 3, 2010

Taking the chips out of Salsa...

I’ve been enjoying salsa a lot lately, but not the kind that I dip tortilla chips in. I’ve been doing a Zumba class, quite regularly, at the gym. In case you’re unfamiliar, Zumba pairs ballroom dance steps with Latin rhythms and driving beats to provide a great workout. The hour flies by. I’m a pretty good dancer to begin with, although I do occasionally do the steps backwards because I watch the instructor in the mirror. Our instructor, Laura is talented and energetic. She is friendly to her students; she has a beautiful smile with a slightly devilish twinkle in her eye. And let’s face it; she’s got a killer figure. I’ve come to notice that many of the basic principles of Laura’s Zumba class can be applied to cooking, especially if you’re a beginner. If the principle is in bold, capital letters, please imagine it to be Laura screaming, because this is what I hear. (Incidentally, the thought of Laura screaming at us is comical, because she’s so kind. Sometimes she hollers directions and then giggles.) Don’t be afraid to refer to or defer to an expert There’s no shame in following a recipe until you're comfortable or asking the help of someone more experienced than you for assistance with your technique. That’s what we’re here for. We want you to enjoy this as much as we do. We also want to be good examples and you keep us sharp. (Seriously, I would not mind being as fit as Laura one day.) Keep it fresh, mix it up As soon as I seem to get one routine and or song down, Laura plays a different routine. After I stumble around the first few beats, I find myself getting in the groove. You might make the fluffiest scrambled eggs in the East, but after you get that technique down, it’s time to move on to omelettes. WATCH YOUR CORE!!! “Ugh. Do I have to suck in my abs again?” May translate to, “Ugh, I hate chopping!” True, but your core skills and core disciplines are what will help you produce wonderful foods and then advance to the next level. You may even notice that you hate chopping because your knives are dull (core discipline) or the onion falls apart (core skill- there is one for round, semi-hard foods). Learn them. KEEP MOVING!!! Practice makes pretty darned good. During each session, if you’re lucky enough to be able to pay attention, you’ll find yourself improving your form and knowledge base. We all “miss the beat” sometimes. Sometimes, we forget ingredients or we screw up the technique. Other times, the recipe can be seriously flawed but we don’t figure that out until we are much more confident in our skills or we’ve tried it several times. So be it. When Laura has a routine that doesn’t go smoothly, she just matter-of-factly says, “I didn’t like that one very much” and moves on. When she misses the beat, she smiles, giggles and shrugs. We all dance to our own beat, after all and it is for fun. THE MUSIC DIDN’T TELL ME TO CHANGE STEPS!!! Find your own beat. Do your best to pay attention. One Sunday, Laura was on fire! We drilled and moved and sweated! More importantly many of her lessons revolved around listening to the music and letting it tell you when and what to do. I pay careful attention because that Laura is tricky!! Just when I think she’s going to do one step (because she did it that way last week) she’ll mix it up (and smile when she tricks me-I stand in the front of the room). In cooking, as you progress, you may encounter a recipe that directs your technique one way but your instincts say something else. You may try to premeditate what will happen. Try your way and see what happens, or not. It’s about finding your way and being able to distinguish the times you know best, the times you should follow the directions and how to combine the two to collaborate. And Laura’s best scream of all: I DIDN’T GET THIS WAY OVERNIGHT!!! Well, that’s good to know, Laura, because that means there’s hope for all of us. But it’s the truth. Nothing good comes for free and if the outcome is a fun experience that results in a delicious dish, then I think it’s worth it. Don’t you?